SUBSCRIBE TODAY Smiley face  Get updates via email! 


We Are Flying Solo

Showing posts with label safety. Show all posts

October 10, 2019

Afternoon Project: Build Simple Jump Standards For Cheap (Or Free!)

In a fit of delusional optimism on Sunday, I decided to use some of my hoarded scrap lumber to build a set of proper jump standards.  This would be an upgrade from my previous scrap standards, which have now disintegrated since I never got around to sealing them & I gave up on them after Encore got hurt.

Said optimism was obviously misguided, since I am taking Echo to the vet tomorrow.  He displayed a very sore stifle last night with some odd characters.  I am hoping it's just a "young, growing horse" thing or some other mild sprain, but I want it checked out right away since I am EXTREMELY gun-shy on stifles after Encore.  Not like I need another vet bill, but the alternative is giving myself 47 ulcers over the weekend, sigh.

Anyway.  Buildy thingies.  Also excellent for distracting the Monstrous Voices Of Overthinking.

Quick How-To Guide For Simple Standard Construction

These actually cost me $0 to build.  I had an eight-foot 4" x 6" left over from another project, my pile of "scraps salvaged from house construction dumpster" five years ago, plenty of paint from painting ground poles, & I always have a tub of deck screws around.  It didn't take me long, about 2-3 hrs including sanding & a quick coat of paint on the bases.  

Standard Preface from the Safety Nazi:  Tools are awesome, but don't mess aroundWear your safety glasses, close-toed shoes, ear protection when necessary, & pay attention.  Horsewomen are badasses, but work smarter, not harder.  You can do most anything you set your mind to, but make sure you have been properly instructed, know your equipment, & always plan ahead.

My materials list:
  • 8-foot 4" x 6", cut in half to make two 4' standards (I don't need anything taller & shorter = lighter)
  • Eight 12" (or somewhere in the vicinity, some of mine are a little longer) long boards for feet; you can use a 1" x 6" or mine are leftover deck planking boards
  • Deck screws, 3-4 per foot board
  • Paint or stain to seal (after staining the shed footers was such a pain in the ass, I opted for paint, so much faster & dries quickly)
Tools I used:  Circular saw, drill, impact driver (I won't lie, I use this for everything), 1/2" speed cutting bit (for pin holes, you could also use a spade bit), tape measure, pencil
All my junk & my sophisticated work table, don't know why photo is dark
I started by cutting the 4x6 in half.  Yes, most standards are made with 4x4's but as long as you have a 4" face to fit a standard jump cup, it doesn't matter.  I think the extra 2" on the long side may be a stability bonus in the end.  I purposefully didn't make the cut exactly straight so that water will drain off instead of sitting there & rotting the wood from the top.

Then start attaching your legs.  Attach the first one flush with the bottom of your post & work around, attaching legs in a pinwheel fashion.  I put 4 screws on legs on the wide face, 3 screws on the narrow face, since it was a tight fit.
Attaching my mismatched legs (just like my actual legs)
Screwing tips (yeah, maybe I just wanted to type that):  (1) set your screws about 1" in from the edge of your board to prevent cracking.  (2) Drilling a pilot hole will help with the same, I did this extra step because my leg scraps were dry & old & it successfully avoided splitting them.
Pilot holes in the first foot
Measure out your pin hole centers.  I started at 18" from the ground & proceeded in 3" intervals up to three feet.  I did check how the cups would sit & confirmed that the top of the poles would be even with the pin hole centers, so that would be a true jump height.  Measure a second point from the edge of the post however far back your cups extend (mine are 1 and 5/8"), which will give you a target to center your big drill bit on.
I'll drill where the lines cross
Drill your pin holes.  Some types of cups demand straighter holes than others.  I'm trying out the Dapple Equine one-piece cups (I technically did spend money to purchase these, but as they are not part of the standard itself, I'm still calling them free standards), which allow for some slop.  So I eyeballed it & the ones that weren't quite straight were easy to shave a little extra off of.  Drilling treated posts requires power & a sharp bit - have a spare battery handy if using a cordless drill/driver.  I love these SpeedBor bits, they chew a big hole efficiently & don't require crazy torque like a ship auger does.
Drill w/ SpeedBor & completed holes
That's basically it, you now have functional standards.  I knocked the edges & rough bits off with a sander to hopefully reduce my splinters when I grab them.  I threw an initial trademark UAPJ (Ugly-Ass Paint Job) on the bases since the sun was setting & I wanted an extra coat there.
The finest UAPJ work
They now have two more coats on the posts themselves & I plan on putting another coat on the bases on Saturday.
Just waiting for that mythical creature, Sound Horse
If you want to add some decor using more leftover lumber, click for directions on how to throw together some even easier "Poor Person Flower Boxes."

I haven't gotten a chance to even set them up yet.  If you have any spare good luck to send our way, I could definitely use it.  I'm trying hard to hope that Dr. Bob will give us not-completely-terrible news tomorrow & I can use my pretty new standards soon...

October 26, 2015

Orange Is The New...Orange: Including My New Favourite Neck Strap!


Solo getting his glow on in last fall's gear
Autumn:  beautiful riding weather...and rifle season for deer!  This means it's time to play "decorate in reflective strips & blaze orange" to make sure there is no room for uncertainty -- I am indeed a dork on horseback, NOT an enormous doe.

Once again, the great folks at Horze.com can help you & your partner stay safe with more accessories (enabling sequence initiated)!  Even outside of hunting seasons, being seen is critical, particularly if you ride near roads or in low light.

Orange You Glad I Can Use This Pun?

This October, they sent us a pair of their blaze orange reflective splint boots along with a matching nylon harness/yoke.  Both are emblazoned with broad reflective tape & bright print to appropriately scream, "HEADS UP!"

Sexy turf horse safety (sorry the orange looks yellow in pic)
One of the things I've appreciated about their products is the feeling that someone was thinking about what really matters to the average rider:  affordability & simplicity without completely sacrificing practical durability.

The boots are neoprene lined with solid, even stitching; they slid right into place & stay put while jumping without having to use "velcro death grip."  Which for those sensitive-skinned TBs, means no rubs either.  You bet they are lined up for use as turnout boots too (free bonus: finding your horse in a dark pasture gets much easier).

Can you see the boots??  ;P
I loved the easy clip around the neck of the yoke, which was also adjustable there & at the "make your own girth loop" attachment.  Visibility + neck strap rolled into one!  Although I think mine has the buckle stitched on incorrectly for the girth loop -- no worries, though, with their 100% happiness guarantee & free shipping both ways.
Reflect upon the visibility power!!
And my favourite part of both?  Hose 'em off when you're done, hang to dry, all clean!

Remember:  Knowledge IS Power...And Safety!

No matter where you are, always be aware of your local laws & regulations.  NC has a new law this year, making it legal to hunt deer with rifles on Sunday on private land (previously only bow-hunters & falconers could hunt Sundays).

So check your area's natural resource agency webpage:  we must all be responsible when sharing land & do our best to help prevent accidents.

U.S.: Get started finding yours here (although missing, uh, ours, LOL)
Our state's law requires all hunters to wear blaze orange in season & our Hunting Safety Education officers have done a great job making it a universally recognized symbol statewide.  We can use that to our advantage even if we're not the one in the deer stand.

Thank you again to Horze for sharing; check out more of their great line of safety gear (oh, I covet the sheet!!) & be seen, be safe, no matter what!
www.horze.com
 

July 31, 2015

The #1 Reason To Wear A Helmet That You Didn’t Think Of

Heck yeah, helmet went to Ecuador in my carry-on!
I'm going to let you in on a secret:  there is something worse than losing your health, or worse, your life, to a TBI, especially a preventable one.

Even more devastating is losing a person you love to a TBI.

It’s often left out of the equation because it falls into the category of "things that happen to other people," like malaria & plane crashes & armed robbery: awful, yet somewhat abstract.  Until we become one of those people.

How do I know?  Because I became one of those people.  My love, my future, my everything…vanished.

But this post isn’t about me or the story I still can’t write.  This post is about opportunity & hope for countless futures, countless moments that can continue to shine thanks to you.

Sexy 2010 Solo (Pics of You)
It’s A Holiday Sale-day!

August 1st, 2015 marks the 5th Riders4Helmets International Helmet Awareness Day.  It has grown & inspired remarkable progress, literally around the world; equine retailers & helmet manufacturers have joined the team to offer huge inventory sales. 
You can find the Master List here.

All of this makes an easy-to-use, well-designed, thoroughly-tested (raises hand) safety essential even more accessible no matter what your discipline or income bracket (waves again from the bottom of that barrel).

  • Want a fresh new look?  The options have become almost limitless. Customize, airbrush, & bedazzle to your heart’s content!  Sport an understated accent piping for the hunter ring or don Western leather to match your trail saddle.
  • Go straight from schooling to show ring on a budget.  Gone are the days of the white mushroom (although I flew one all the way to Australia & back for noggin protection during residence Down Under)!  All your favourite brands have lighter, cooler, more diverse redesigns – in technicolor!  I tried out Troxel’s new Intrepid last year & I can’t believe how comfortable it is…for less than $60!!
  • Never owned a helmet?  It’s not like insurance: yesterday’s actions don’t matter & no one holds a grudge.  Your local store reps will be thrilled to help you find the style & fit you love; if you don’t have one nearby, I’ve spoken with dozen of friendly voices from online retailers like Dover & SmartPak.  Many will allow you to order multiples & return at no charge, as they should, since YOU are priceless.
It’s My Personal Choice & I Just Don’t Want To

Ah, the final bastion of hold-outs.  Which I refer back to the beginning of this missive.  For your “choice” is not truly yours alone.  Do you have a significant other?  A best friend?  A parent?  A sibling?  Offspring?  Take a moment & consider the responsibility inherent in any caring relationship.


Particularly if you yourself are a parent – even aside the obvious, that EVERYONE should wear a helmet -- children are dependents.  Where will yours be if your horse simply stumbles at the wrong moment & like far too many I’ve known even locally, you suffer a catastrophic open skull fracture?

Yes, that’s a dire image, but it’s a very real one.  Horses bring a myriad of risks & we can’t negate them all, but this is, pardon the cliche, a no-brainer.

Don’t let yourself be caught in the complacency trap of “I don’t gallop over giant logs or anything,” either.

Treasured always
  • Ask my wonderful dressage trainer, experienced at PSG, who’s had surgical repairs to shattered ankles TWICE…while walking trained horses on flat trails.  
  • Ask my neighbour, whose leg just spent 8 weeks in a cast with pins…after his trail horse slipped walking down a hill.  
  • Ask me, who landed on my head two years ago…because Encore, STANDING STILL, suddenly felt like something stung him in a meadow.
Geez.  Trail riding is dangerous.  0.o

The Point Is…

Even if you don't want to do it for you, do it for the sake of those who love you.  For them, for me, the greatest gift you can give is sticking around.

February 7, 2015

Priceless Tips For Working Safely Outside

Still my favourite safety graphic...
All of us have reason to challenge The Great Outdoors.  Some of us even get paid (sort of) for it.  Although we in the latter group try to be certain we only hurt ourselves when NOT covered by Workman’s Comp.  Why lessen the burden on our already meagre salaries??

However, unless you are a cave troll (in which case, congratulations on mastering literacy & internet use!), if you are involved with horses, you will find yourself faced with Outside Tasks.  Whether it be opening a hay bale, removing a loose nail from a fence post, or something else, it is critical to always use all available safety gear & plan ahead to avoid needless injury (the last bit is our horses’ job, duh!).

Because Eventer79 Wants To Keep You Safe:  Things You May Not Have Considered
 
For example, you may have a few pine trees in your horse’s pasture, carrying a collection of small spears dead snags & branches on the lower portions of their trunks.  Should you decide to take care of this on a whim one morning, it is first important to choose an undersized tool.  The more ineffective it is, the more fun you will have!
 
My pines only LOOK innocent
When you engage your tool of choice, in this case, a very sharp hatchet (because borrowing an axe or chainsaw from neighbours within shouting distance will only hinder the insistence of your brain that you are going to do this NOW), try these techniques:
 
  1. Pine trees have brittle bark, which splinters into tiny shrapnel with every blow.  You should definitely not bother walking back inside to get sunglasses to protect your eyes.  Your prescription is already –8, there’s not much to lose anyway.
  2. Make sure & stare directly at the branch when you hit it, preferably with your mouth open, so that all of your mucous membranes can enjoy the shower of bitter, painful pine shards.
  3. To avoid this, you can adjust your position in relation to the branch.  I suggest standing precisely downwind, so now, the shrapnel can be blown right into your face with no effort whatsoever.

Another Easily Forgotten Phenomenon

If you are standing below say, a dead limb, & you whack at it with a sharp, metal object, the limb, being subject to a force called Gravity, will fall down when loosed from the tree trunk.

No worries!  By ducking & cursing, you may get lucky & only part of it will bounce off of your body (layers are your friend).

Returning To The Brittle Nature Of The Pine

Another special characteristic to enjoy goes something like this:

  1. After whacking at the base of a larger branch with your hatchet for a few minutes, you may decide this isn't fun anymore & your shoulder is tired the connection has been weakened enough that you can now use your body weight to snap off the whole thing at once.  
  2. Nooo...not like that!
  3. Remember your physics:  the farther away from the pivot/breaking point (where the branch joins the tree) you are, the greater force you can exert with the same amount of effort.  So you don’t want to try this right at the base.  Torque = Force x Moment Arm, people!  (No, I have no idea why that one stuck with me, but it's been endlessly useful since 1998.  If you know what a breaker bar is, you know what I mean.)
  4. Pull back hard a little ways out & if you do it correctly, the part you are holding will break off in your hands so you fall down immediately.  Success!  
  5. Even better, the large chunk between your hands & the tree trunk will also break off at both ends & become a completely unpredictable 12” projectile of 2” diameter wood.  Remember:  DUCK & CURSE.

Finally, If You Can Still See

And you have not managed to cut off your ear while scratching your nose with the hand holding the hatchet (sharp end right next to your face, of course):
STOP LAUGHING, PLANT!

  • Halfheartedly whack at poison ivy vines as thick as your arms.  
  • These are even better because instead of splinters, the vine disintegrates into a powdery dust.  Just like campfire smoke, no matter where you stand, this delightful cloud is guaranteed to blow directly into your face & eyes.  
  • In optimal conditions, you are also allergic to poison ivy.
Since you're probably now exhausted due to the completely impulsive nature of this effort, undertaken before you have eaten breakfast (but your horses have!), it is best to just give up after a handful of completely useless cuts.  You may have filled your eyes with poisonous oils for nothing, but you sure told that vine a thing or two!

Oh, sorry, too late...

December 18, 2014

Horze Enables My Inner Boot Addict & Safety Police All At Once?!

Um, not that kind of grail boot...WTF is that?
AND THERE WAS MATCHING!

I know, I had to take a few deep breaths too...

The Boots & The Blue

A few months ago, I shared my inadvertent discovery of the holy grail of bell boots:  no-turn boots that actually did not turn!  They continue their awesome, although they do live in the "special occasions" pile.  Ok, because I am not motivated enough to yank off the pull-ons Encore lives in...but also because they are so pretty.

Bee-yoo-tee-ful dark blue
In what I believe must be a covert agreement with the NSA, Horze discovered that in my initial "horse equipment acquisition" years, my weak spot of addiction lay smack in the middle of horse boots of every shape & size (geez, 2010 doesn't sound like that long ago, but pardon a moment of silence as I consider how much had not happened yet...).

Speaking of those boots of years past, I still have (& USE), in perfect condition, those Moxie ankle boots, the 5-strap Woofs from the trash can at Waredaca & both the Roma & N.E.W. front boots!

Click = embiggen
It turns out, though, that the beautiful matching shades of the No-Turn Boots & the Lyon Synthetic Gloves existed in a threesome.  I introduce to you the Horze Tendon Boot:  I challenge you to find a colour (there are NINETEEN) that doesn't match your ensemble!!

Naturally, there was only ONE appropriate choice for TFS & I confess I was taken aback a little by how much I liked them.  Both the plastic shell & the neoprene liner were just the right amount softer (mea culpa for that horrific grammar) than the Romas, lending the boot a nicer ability to mold to Encore's legs.  But they still felt sturdy, had strong velcro & stitching, and, erm, did I mention the matching...?

*places reverently in Pretty Boot Storage Basket with matchy bell boots*

Those are totes the trash-can Woofs...
And Safety Too?!

Be still my heart.  Because one pair wasn't enough.

Encore is a bit base-narrow behind, so he sometimes wears a set of Nunn Finer pastern wraps (always when studded, as at left).  However, the outer layer of these started falling off within one week of purchase.  I've continued to use them for several years, as the neoprene is fine.  The velcro is beginning to fail, so I do tape them with every use, so one could say it's becoming a bit of a pain.

Combine my casual lookout for their replacement & my insatiable desire for anything that says, "I AM NOT A DEER NOR CAN YOU CLAIM MY CORPSE RESEMBLED ONE" in our lovely NC Decembers and you get this:

Strappies
The Horze Reflective Leg Straps, which fit nicely on the big boy's pasterns & have a handy built-in "velcro failure backup system" in the nylon strap.  My only trouble was deciding what to do with the end of the strap once fastened.

Keepers are not included, so I'll likely just keep the tape handy.  Much easier to throw a thin strip around the end of the strap & still have insanely bright reflective power!

Alternatively, I may cut the end off entirely, although this does limit one's adjustability somewhat.  I don't have any plans to buy Clydesdales in the near future though...  The plastic buckle itself is a wee bit fiddly, but definitely clamps down tight & we had no rubs on a long, muddy ride through the woods.

Two hooves up!  Although if there is a passing car or a camera flash or a reflection off your sunglasses, you may see them so brightly that you'll walk into trees for the next five minutes.  That could just be me...

I swear upon Solo, pastern reflection from flash not enhanced!!

Not Everyone Is A Grinch

In the spirit of the season, the friendly folks at Horze added this festive helmet cover to the box.  Grinchy-me hesitated at first, but then realized a bright red helmet is yet another great way to stay very, very visible (particularly to folks who make their own seasons...or don't follow any at all)!

Solo's wonderful Minion Erica (thank you for being badass, Erica!) submitted the cover to a grueling ground test:  I think I can see it!


Thank you so much AGAIN to the super-friendly folks at Horze for giving me the opportunity to want even more of their stuff try out their products & share the skeptic's perspective with you!
 

September 14, 2014

Ordering Could Save You Money…And Your Life!

Horze signup_competition
Click to enter & get a 15% off discount for new customers!
Yes, you may now call me a Horze ‘ho. Albeit within the confines of a most basic TFS Commandment:  thou shalt always receive open, honest feedback!

I continue to enjoy our appallingly stylish (if you’ve read for a while, you know my trendiness aversion!) bell boots & gloves (week two: still no holes!).  But the goodies don’t end there:  check out two more!

#1:  Tired Of Losing Money In Trampled, Peed-On, Rolled-In Hay?

Another equine product that makes you want to throw things & scream:  the Hay Net.  The holes are too big.  The holes are too small.  That drawstring at the top has demonic intent to prevent the loading of any actual hay.  If it doesn’t have a drawstring, the holes are too big...again.  If the holes are just right & it lacks an evil drawstring, well, you must have entered a parallel universe of impossible fantasies.

Currently, I hang a small-hole drawstring net in the trailer.  Yes, it makes me want to scream very bad words while filling it.  But I love that I no longer lose huge quantities of $$$$$ hay onto my trailer floor.  It frustrates the crap out of Encore; unless I pull out a bunch of “starter clumps” for him to grab, he believes it’s too much work & gives up.  *insert eyeroll here*  In the fields, I dole out flakes on the ground or in an old trough with a pin-holed bottom.  I don’t. do. round bales.  (Unless someone wants to mail me a $300 net & a spear for the tractor…)

Hay Net 2
Mine!!
The Horze Slow Hay Feeder Net looked like a promising solution:  HUGE open top with perfectly-sized holes with a simple hanging design that I could move between trailer & run-in in a snap.  While slightly more expensive than my $11 trailer net, at $24 it was still half the cost of the $55 wall-mount from CinchChix & more flexible.

Loves:
  • I can walk up with 4 flakes balanced on one arm, pull the top wide open, & dump them in without loosing a bit
  • Easily holds at least 1/2 a square bale
  • Two simple mounting loops give you endless hanging options, including my carefully engineered “tie it to the rafters with hay string” technique
  • Two sets of short “shoelaces” are sewn into the top binding so you can dissuade Dobbin from just shoving his entire head in
  • Since the boys love to camp in their shed on rainy days, it lets Solo continue to “graze” under shelter & holds so much hay, I don’t have to worry about mid-day refills (not tested on Princess Encore-I-Like-To-Pee-In-My-Hay yet)
  • After I add a double-ended snap to each hanging loop, I can hang or move it anywhere by simply unclipping & don’t have to mount anything permanent
Hay Net 1 Arrows
Awesome MSPaint arrows indicate shoelaces
Minor Design Struggle:
  • The enormous top-load is amazing; it could be even better if the “shoelaces” were not both sewn onto the same binding edge.  I weave them to the other edge a couple times & tie a slip-knot for easy release, but it’s a bit awkward (hey, some people have weird, super-logical brains that struggle with lopsided things).
  • Alternatively (& what I initially thought the “shoelaces” were), a simple drawstring inside the top binding with a cord lock, like this, would be awesome!
One Sad Discovery:
  • Because the netting is softer than a traditional hay bag, it is easier for the horse to snag the hay, & hopefully will be less frustrating for Encore.  However, after about 5 solid days of Solo-use, the net string on a bottom corner is unraveling & pulling out of the side binding.  Mr. Shiny loves his hay & is serious about getting every scrap; it appears that the string is not strong enough for full-time shed residence. 
Despite this initial material failure, though, it shall receive some hay-string patching for continued use!  Horze DOES have a 30-day "happiness guarantee," should you have problems with any product, as well.  While not cut out for full-time “grazing,” I still think it has great functionality for trailering, temporary show-stabling, & other less “aggressive” situations where easy filling & hanging are key!

hunting visibility
Probably not the helmet I'd choose for deer season...
#2:  Serious Safety

While there are many things I love about the Carolinas, fall is not one of them.  It’s perfect riding weather, the trees break out their technicolour dreamcoats, the demonic insects begin their retreat.  What’s not to love?

Oh, it’s also rifle season for white-tailed deer.

A Little Perspective

As an employee of my state’s natural resource agency & a wildlife biologist, I get to see both sides of this…interesting time of year.  Nearly all of my co-workers hunt deer, as well as ducks, doves, turkeys, & feral hogs with bows, muzzleloaders, shotguns, & rifles, as personal preference varies.  And they do it right:  each one is careful, responsible, ethical, educated, & experienced.


wrong end of gun
MN wins the prize for Best Safety Graphics
Unfortunately, just like horse-world, riddled with double-edged swords, a conscientious participant in hunting-world is not a guarantee.  Outside of work, as a horse & property owner, I must always be alert for the bad apples.  It only takes one guy who thinks it’s funny to shoot a horse out from under someone, or brought a case of beer to the stand, or fires blindly at rustling leaves, or…it happens every year (and all over the country).

We Can & Should Share The Woods, But Be Proactive

As a result, many of us simply stay out of the woods once rifle season begins (the bow hunters & muzzleloaders are so much better at paying attention).  When we do head out on trails, we stick to state parks & private properties.  Even then, I always wear my very sexy DOT safety vest from work (sigh, trespassers…), attach a bear bell to my saddle (I need to fix that), & wear bright-coloured clothing.  I’ve got the vest on for tractor work too; the favoured.30-06 rifle can send a bullet 2-3 miles, so at least no one will be able to say I looked like a deer through the scope!

Solo Reflective Horze Strips Sept 2014 compressed
Glow-in-the-dark Solo!
TL;DR:

I have finally completed my seven-year quest for very affordable riding accessories that didn’t make my horse sweat & screamed “THIS DEER-COLOURED CREATURE IS NOT A DEER!”  And the answer…is $4!!!!

A handy set of four hi-vis reflective sleeves with open ends, the Horze Bzeen String Covers, despite their odd name, incorporate the two best elements of product design:  versatility & simplicity.  I’m not sure if this is standard, but I received two that had velcro down one side & two slightly narrower sleeves that were sewn on both sides.  I slid one of the latter onto a browband & velcro’ed both of the former on my martingale for a test run.

You can definitely see them!  I’m very excited to have these additions to my safety arsenal & am already pondering how many I could fit on one horse!  The nylon fabric feels thin, but sturdy & can get tossed in washing machine whenever needed.

My only “in a perfect world” very picky detail changes

  • Either include velcro on every sleeve or give the buyer an option
  • Offer them in blaze orange, the universally (or at least in the US) recognized hunting safety colour 

Thank you so much again to the super-friendly folks at Horze for giving me the opportunity to want more of their stuff try out their great products & helping me share them with you!
www.horze.com

July 11, 2014

It's Never To Late To Strap One On! On Sale!!

http://www.riders4helmets.com/ihad/
That's right, the FIFTH annual International Helmet Awareness Day is tomorrow, July 12th!  Not only is it your chance to score a great deal on the rather staggering array of new helmet options, but it's also an excellent opportunity to shine a spotlight on Riders4Helmets, a vibrant organization that began in the wake of Courtney King-Dye's tragic accident in 2010.  Courtney has become an inspiring participant and speaker at events around the work, all while teaching and working on her own constant rehabilitation schedule.  Here, three years after her injury, she looks back on the momentum she never imagined would roll through the equestrian world. 


Even in the past year, we have sadly witnessed injuries and fatalaties both in the spotlight (Silva Martin's severe concussion WHILE wearing her helmet when she struck her horse's neck on the way off; I know she and Boyd are both so grateful she wasn't bare-headed) and far away from it (a local trail rider died of a catastrophic open skull fracture a few months ago when her horse was surprised, she lost her balance, and her un-helmeted head hit the side panel of a nearby truck).

My Horse Is A Veteran & I Haven't Fallen Off In Ten Years, Why Bother Now?

Colours!!!!
If not for you, do it for the people who care about you, because I can tell you first hand, losing someone you love to an unexpected TBI (Traumatic Brain Injury) is a devastating, life-altering event that you can never recover from.  No one ever sees that one terrible second approaching, that's why they are called "accidents."  So, in one easy step, do the right thing and dramatically reduce a huge risk factor in your favourite hobby and keep the "dents" out of your skull. 

Bonus:  it also keeps spiders out of your hair on the trail and, yes, now you can even put rhinestones on them (no, no I did not).  I must confess my impressed surprise when I tried out the new Troxel Intrepid; it's my new everyday helmet, replacing my trusty Tipperary Sportage (sorry, but the Intrepid is cheaper AND lighter).  The fresh designs really are lighter, cooler, and more comfortable than ever!

Which one is your favourite?

June 11, 2014

17 TFS Tips For Thriving In Southern Summer

B and Solo Trail Ride Dec 2013 crop
This past December...
Ah, Carolina summer, you have returned.  I noticed your chortling embrace when I took two steps out the back door & then needed to change my shirt because all of my sweat came out at once.

OH, BUT IT'S BEAUTIFUL IN MAINE TODAY! 

I can hear the gloating from you Yankees (hee), but I can take it:  I'll be enjoying my t-shirt XC school in February while your tears freeze onto your snow shovel.  I did my time.

For my compatriots who spent their younger years chipping vehicles out of solid ice blocks & kicking giant ice cubes in the shape of five-gallon buckets & dragging full muck buckets in sleds across snow...and bolted when they got the chance--

I wanted to share our tips for living and working (oh yes, I sweat & carry heavy things all day long and then come home and -- sweat & carry heavy things; it is possible that I am stupid.  Oh wait, I own a horse; scratch that: definitely stupid) in our "included free with purchase!" sweat box.

WHAT HAVE I DONE?  HELP ME!!!

If you (and/or your horse) are new to this dance with 100% saturated air that does not produce rain, you are probably staring with dismay at your car, a mere 100 feet away from your front door, perplexed as to how to get to it & still arrive at work without looking like you LITERALLY just stepped out of the shower -- a really smelly shower with no towel.

I promise, the first summer is the worst, but that is why I am here for you, & why you obviously make smart choices by reading this ridiculous awesome blog.  We can all learn by experience, but you aren't required to.

ALL YOUR PROBLEMS, SOLVED

Humans:

(1)  Take your time:  there is a reason we do everything slowly, including speech.  Moving quickly = more sweat.  Sitting in the shade drinking iced tea beer = less sweat.

(2)  Read this postCotton is NOT your friend.  Ever.  Unless you enjoy slowly suffocating in a blanket of your own perspiration.  Stalk those amazing technical fabric running shirts (bite me, equine brands who want me to pay $50 for a t-shirt, er, bless your hearts, I’m a “normal” person, not made of disposable cash), you can find them on sale at a myriad of sporting goods/outdoor retailers for $12 or less.

(3)  Read this post.  Oh, CoolMedics, bless your heart (practice this phrase, it allows you to say anything without actually insulting someone).  Evaporative cooling is indeed a sound scientific principle – WHEN EVAPORATION ACTUALLY OCCURS.  5000% humidity, not so much.  Thick layer of soggy textiles = misery.

(4)  I wear a handkerchief under my helmet.  (1) Stops profuse sweat from running into my eyes when riding (it burns us, precioussss!) and (2) when I pull off my helmet, I immediately put my head under the hose and soak hair & fabric.  I’m aliiiive!

FivePointsHT_1561 (Medium)
Jacket-free in the arena at Five Points HT
(5)  Speaking of helmet, you better still be wearing it!!  >:(  It also keeps the ticks/spiders/branches/bird poo out of your hair, as well as said sweaty, nasty hair out of your face.  Same goes for the XC vest.  At a certain point, it’s just bloody hot no matter what.  Never compromise your safety.

(6)  Speaking of attire, seriously, skip the butler jacket unless absolutely required.  I dehydrate FAST because I sweat a lot.  Even in my awesome wicky outfit, if I don’t follow my strict hydration rules & keep eating protein, I will throw up/pass out/prefer to die.

All of our competitions at CHP will waive jackets as soon as it gets steamy out.  In addition, at ANY USEA event where all three phases occur in one day, you NEVER have to wear a jacket.  A technical, tidy polo or show shirt of your choice is fine (it doesn’t even have to be white, *gasp*).  Read the rules 

If you stubbornly refuse to part from your black coat and come down centerline red-faced & drenched in sweat and then fall off after your test due to heat exhaustion, you do not look “respectful,” you just look (well, floppy & damp) not-very-smart and I dislike having to worry about the safety of fellow competitors (yes, I’m that person).

(7)  Never forget your SUNSCREEN SUNSCREEN SUNSCREEN SUNSCREEN.  And a wide-brimmed hat with a mesh top is a wonderful thing in the sun when you are not mounted.

(8)  Permanently attach a water bottle to your body or the nearest fence post/jump standard/truck hood.  When I am doing field work & riding in the evenings, I can drink 3 L of water in one day & never have to pee.  It all comes out my pores (yes, I sweat like a pig, I don’t glow, I’m not a “lady”).

If you feel thirsty, you are already dehydrated.  I don’t even buy bottles smaller than 1 L – I keep about six in my refrigerator and refill & rotate (REUSE YOUR BOTTLES!).  I will also never again live without an icemaker in the freezer. 

(9)  Elaboration on hydration:  I have made a rule that when traveling to a competition or lesson, I must drink 1 L of water on the way there.  NO EMPTY BOTTLE, NO EXIT TRUCK.  It’s hard, but trust me, it makes a huuuuge difference.  The next bottle is half Gatorade (G2, less sugar), half water.   

Tip from an ex-semi-pro mountain bike racer & over-educated gym rat (ha, not me):  Sports drinks by themselves are too concentrated for your body to absorb unless you are performing at like a super-marathoner level.  Or riding David O’s circles of death.  Your metabolism changes modes depending on activity level & if you don’t cut it with water, you’ll just pee it right out.

(10)  Once you go outside, stay out there.  I find it much harder to go in & out of air conditioning, having to re-adjust every time.  I put on my super-wicking outfit, grab my armful of fluids, & I don’t come back in until I am done.  Naturally, frequent drink breaks in the run-in are highly encouraged!

Solo Yadkin 08 edit
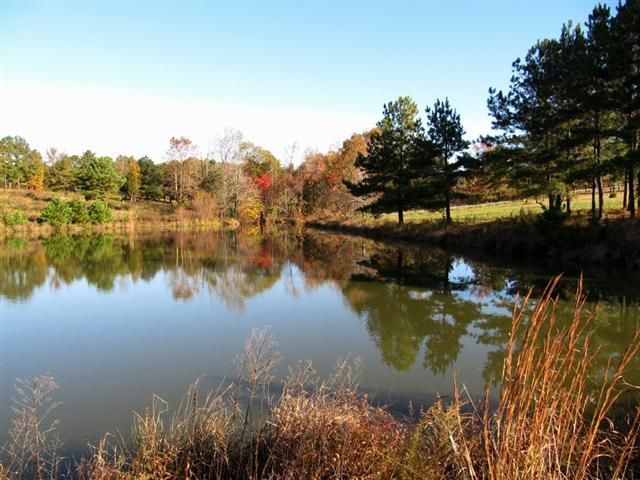
2008!  Solo had a mane...in the upper Yadkin River.
Horses:

(1)  The hottest hours of our days are from 2-5 pm, NOT noon-1 pm (we like to be different).  I try to ride after 6 pm whenever I can.  That said, you DO need to spend some time riding in the heat to heat-condition your horse.  His metabolism can adjust, but to do so, he needs to do some work in the mugginess.

But I’m wayyy past the age where I feel driven to make myself miserable just because…why?  I’m not competing at any level at the moment, my TB does not need to work every. single. day. to stay strong and fit.
 
(2)  I hose my horse before AND after I ride.  There’s nothing wrong with tacking up a wet horse, he’s going to be sweaty soon anyway.  It is CRITICAL while hosing to constantly scrape water off.

Water is a thermal insulator & you can bake your horse in an aquatic oven if you just cover him with water & let it sit there.  The heat is then trapped in his body, which can cause metabolic distress in a big fat hurry.  As you scrape, you will notice the water you are scraping off gets hot almost instantly.

Keep hosing & scraping until that water is cool, especially big muscle groups, like his haunches & neck, & large blood vessels between his hind legs and on his chest.  You can hold running cold water on his jugular vein from his throat to his chest for a few minutes for systemic cooling.

(3)  Fans for everyone.  Small, medium, large, big-ass, plug-in, battery, solar, who cares.  We have physical battles over the space in front of/under the fan.  When in doubt, BUY MOAR FANS!


(4)  Not all shade is your friend.  I prefer open-sided (or 1-2 shade walls) shelters on top of a hill for the horses (breeze, if there is one).  Don’t let the woods lure you in; angry hordes of swarming, maddening vampires await (some call them deer flies).

Lawn Mowers June 14
I didn't want to mow, so I delegated...
(5)  Fly sheets are great…until it’s 102.  The fly boots stay on, but masks & sheets come off over about 85-90.  It’s just. too. hot.  Unless you jump in the pond.  ;P

(6)   Equine electrolytes, but not for the reason you think.  Just like humans, most of the time, the equine metabolism will just pee out the salts in any electrolyte you give him, whether it be paste, or loose salt, or licky blocks.  The important thing is, it makes him thirsty.

For heavy work such as competition, or long trail rides, I’ll give 1/2 a tube before the ride and 1/2 a tube after to encourage drinking drinking drinking.  The boys have access to their favourite pink salt at all times.  Lots of sweat is good – as you probably know, if you don’t see sweat, call a vet (it’s a poem!).

(7)  Horse not drinking as much as you’d like?  Make his water trough more fun – dump in ice, throw in some apples or carrots.  Moisture-rich snacks are welcome, like watermelon, cool beet pulp or alfalfa slurry, or freezer pops (hey, Pete likes them, except for peach).   

And keep it clean:  watch for algae build-up, food dribblers, unwelcome addition of poo (horse, bird, fish) or corpses (beetles, mice, raccoons…hey, it can happen).  If he’s in a stall, multiple buckets are always a good idea.

Now I need to go eat an ice-cream sandwich before I drag some pastures while profusely worshiping the tractor’s sunshadeLet me know how you beat the heat and still have pony fun!
Bonus if you know the movie

May 25, 2014

Fun With Power Tools: How Poor People Build Jumps, Lesson 1

Hey, #mindyourmelon, right?
Want to build your own portable flower box for $5 in under 30 minutes?

Didn't think so, m'kay, bye!  ;P

Now that I have your attention and slavering hope that there might be a useful post ahead -- those of you who follow us on Teh Facebooks and Twitland saw the exciting results of my spurt of inspiration (thanks, Erica!) on Friday.

A better description for this project may be "why dumpster diving pays off," but who doesn't love working out some aggression with a Skilsaw anyway??  LET'S GET READY TO...REDNECK SOME SHIT!  (Note: I must include thanks, growing up with a genius mechanical engineer dad who just about rebuilt our entire house taught me many useful skills!)

Preface from the Safety Nazi:  Dude.  Tools are awesome, but don't mess aroundWear your safety glasses, close-toed shoes, ear protection when necessary, and pay attention.  Horsewomen (don't feel left out, boys) are badasses, but the good kind work smarter, not harder.  You can do anything you set your mind to, but make sure you have been properly instructed, know your equipment, and always plan ahead. 

What I Used (but there are lots of options I'll try to cover)

Photobombing level.
Tools:
  • Skilsaw (optional)
  • Drill loaded w/ drill bit (optional)
  • Impact Driver loaded w/ screwdriver bit (my new love plus I hate changing bits -- that goes for horses and drills ha, but also optional & you can use a screwdriver bit in your drill or a hand screwdriver)
  • Measuring Tape (optional
  • Pencil (or Sharpie, crayon, paint pen of your choice, optional, feeling easy yet?)
  • Wood Screws (w/ good sharp ones you don't HAVE to drill anything)

Lumber:  (2) 2" x 4" scraps (dimensions optional)
              (1) 1" x 6" scrap (dimensions optional)

Other Materials:  Yer flowerz & a camera so you can share your masterpiece.  And a phone in case you have to dial 911.  Hey, "proactive, not reactive" doesn't just apply to riding.

Dang.  Click to read labels.
Step 1:  Get your shit together (don't worry, not mentally, I'd never try that dangerous task!).

I dug my three pieces of wood out of my scrap lumber pile (collected from house construction dumpster; I didn't use a level, it was just in the bag).  They were all around 26" (I didn't care, just wanted it small enough to move easily), I just cut the end off one to match the shorter one (optional).  One also has a diagonal cut on end.  Don't care. 

In the photo above, the yellow box is drill bits and the cardboard box is leftover screws from my HorseGuard fence insulators.  Real pencils work better than mechanical pencils for wood, but I was too lazy to walk to house.  The drill & driver came as a set when my trusty Black & Decker finally died after over 10 years of very hard work in 2013.  Since I had to replace it and was moving to the farm, I made the switch last year to lithium batteries.  Worth. It.  As I learned from my dad, buy a good tool and you only have to buy it once.  And these really are a phenomenal deal if you do your own work, I use them every single day.  I didn't even know what an impact driver was but it came with the drill...and now I don't know how I ever lived without it.  Never strip a screw again!

Step 2:  (sorry, forgot a picture)  Lay your 1x6 flat on the ground.  Set your 2x4's where you want them on top (now your box should be assembled upside down).  Mark the inside edges of the 2x4's with a pencil on your 1x6.  Now you have an area on each side of your 1x6 to drill pilot holes so you don't end up shooting them through the edges of your 2x4's (ah, experience...)

Step 3:  Uh-oh, I spy a slight problem (aside from crappy phone camera depth of field fail).  My screws will be a bit short for a secure grip on the 2x4's.  I am too lazy to walk to the house (errr, theme...) to dig through scrap hardware box.  Solution:  I will drill pilot holes with appropriate sized bit for screw (you want to choose one just a tiny bit smaller than your screw diameter [I very scientifically hold them next to each other and eyeball it] so the screw can still bite into the wood).  Then I will use a larger drill bit to countersink the screws so I can drive them deeper without totally splitting my 1x6 to bits.

Sounds complicated.  Not.  In the drill bit picture, I used the 2nd bit from the right to drill the pilot holes through the 1x6.  Note:  I ONLY drilled through the 1x6, with it sitting on the grass because (1) I'm an idiot and would totally drill through my stall mats and (2) I don't want to drill into the 2x4 because I want the screw to have its best grip there

Then, I loaded fatty bit (seen in drill, I think it's 1/4") and on the top side of the pilot holes, drilled a larger opening just as deep as the head of the screw so the top of the screw will be flush with or slightly below the surface of the wood.  Now the screw will reach farther into my 2x4.  Woot!

Step 3:  My holes are drilled in my 1x6 so I line it up on top of my 2x4's and install screws.  Tips:  (1) Put a foot, weight, or a knee on the assembled box so it doesn't move during drilling.  (2) I put in corner screws first so they will hold the boards aligned so the rest of the screws are easy.  (3) This is where the impact driver is handy-the screws will be tougher to turn when they hit the 2x4 but the driver just laughs and does its thing.  (4)  I used 4 screws on each side.  3 would have been plenty.  I have a problem with over-engineering.  Because I am now kicking myself for not running a bead of wood glue in each seam before the screws.  Since plastic flowers are SO HEAVY.

WTF level??!
Step 4:  Woohoo!  You have a nice little box, as shown (you can see the diagonal end on one 2x4, I just left it, not important).  I was totally going to just eyeball the holes for the flowers, but I decided it would bug me later when they weren't centered, heh.  I had 5 stems (that's my $5 project cost, since I had everything else) so I just measured and marked where each hole would go, starting with the center and working out.  Naturally, I discovered diameter of stems was larger than diameter of chosen drill bit (*facepalm* of course, but I wanted to be conservative so stems wouldn't blow out).  Went up one bit size, all good.


Finit!!  Arrange, enjoy, and be creative!
You can now stain it, paint it, add more flowers, add more holes, use the sides, plaster with stickers, dance around it giggling at your awesomeness (hey, it's the little achievements), or...

Just Jump It!!!